
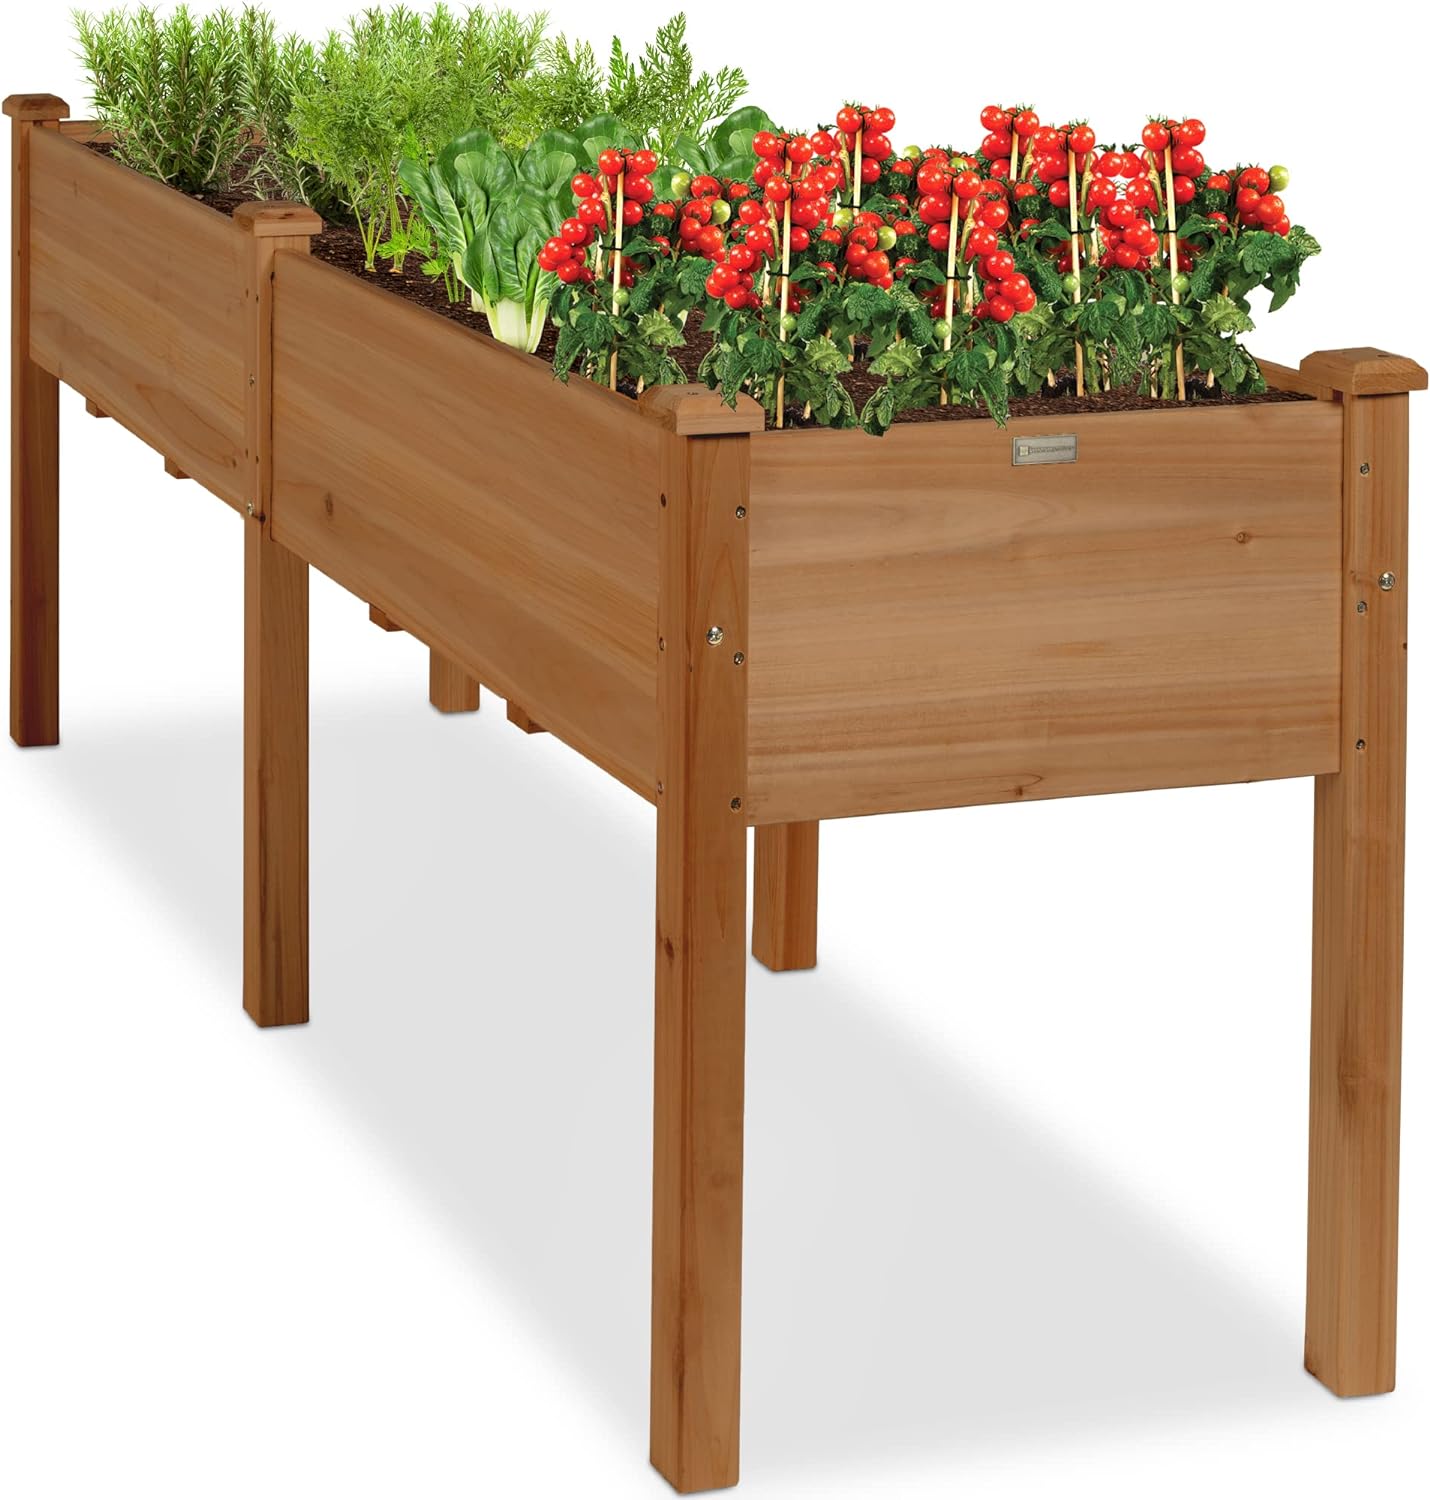


Best Choice Products 72x24x30in Raised Garden Bed, Elevated Wood Planter Box Stand for Backyard, Patio, Balcony w/Divider Panel, 6 Legs, 300lb Capacity – Acorn Brown
Original price was: $149.99.$149.98Current price is: $149.98.
Price: $149.99 - $149.98
(as of Jun 05, 2025 14:35:26 UTC – Details)
Product Description


LARGE PLANTING SPACE: 8.4 cubic feet of space can support your choice of flowers, succulents, vegetables, and more
PROPER DRAINAGE: Six drainage holes help the roots aerate and allow excess water to escape, encouraging long-term growth while helping prevent rot or mineral build-up
ALL-WOOD CONSTRUCTION: Naturally durable Chinese fir wood provides a durable, weather-friendly structure that will avoid warps and sagging over time
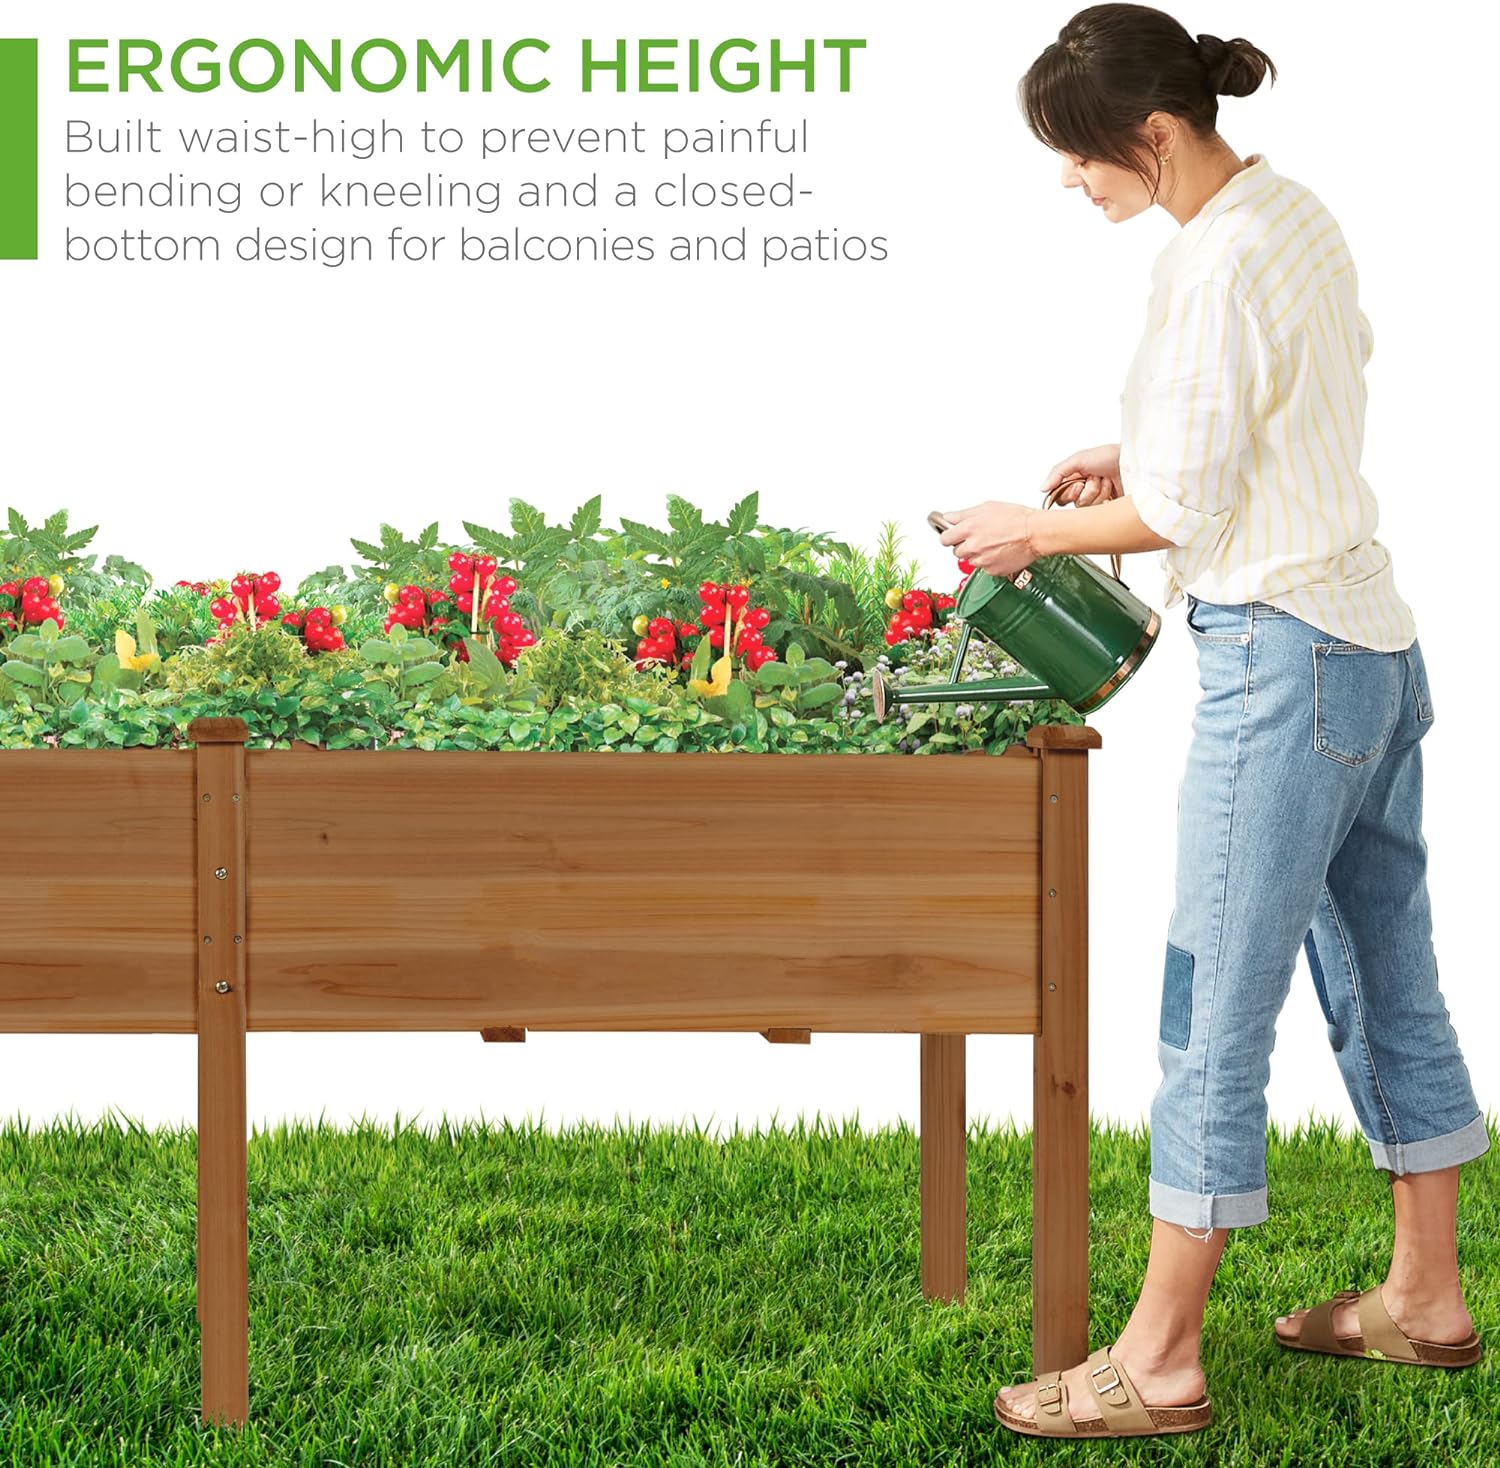
ERGONOMIC HEIGHT: The 30-inch tall design removes the need for bending or kneeling, preserving your back and knees as you tend to your balcony, deck, or patio garden
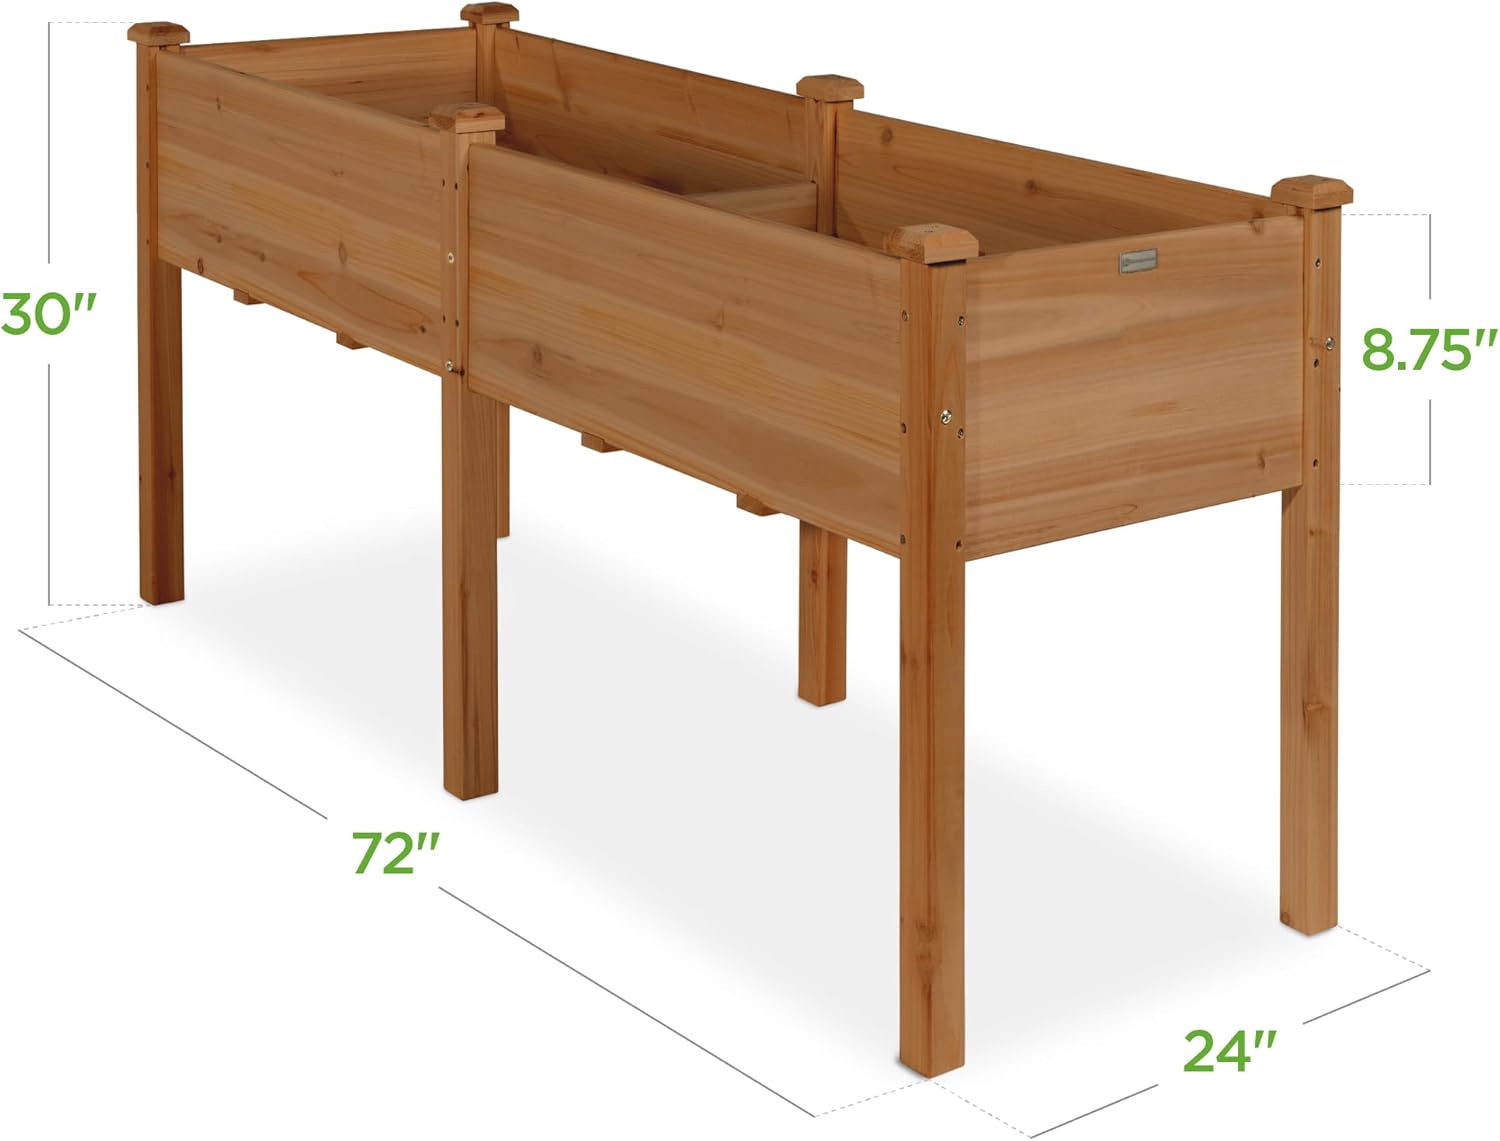
PROTECT YOUR PLANTS: An elevated bed discourages pets, rodents, and other animals from invading your garden space and ruining your hard work; OVERALL DIMENSIONS: 72″(L) x 23″(W) x 30″(H); WEIGHT CAPACITY: 300 lbs.
Customers say
Customers find the raised garden bed easy to assemble and appreciate its functionality, with plants thriving in it. The planter receives positive feedback for its appearance, with one customer noting its warm Acorn Brown finish, and customers consider it good value for money. The size is perfect for 8-10 plants, and while the build quality receives mixed reviews with some saying it’s well-made while others find it cheaply made, customers report issues with wood splitting and holes not lining up properly.


Stephanie Johnson –
Happy Gardening…
I always find a way to do building projects with my husband now. So, these were a perfect project to do together.For the time to put these together. It took us about an hour to put both together. Once you do one. The other one is quicker to put together because you already know how to do it after putting one together. I will say it may of took longer if it was just one person putting them together.About the directions. Building them for us was easy. Directions seemed clear to understand. Everything that we needed to build the raised beds were included. I saw some people saying that they had missing items. We actually noticed they gave us a few extra screws after counting everything the directions said we were supposed to have.About overall build. As I saw others saying. When sliding the bottom boards in. We did notice some gabbing in between where you put the dividers. Which could be an issue for some. This was not really a problem for us because as you can see. We lined the beds with fabric liner. We also think there is a gab because where you are dividing each section. You can keep plants separated that you technically should not plant together. It all depends on how you are planning to use these raised beds. I made sure to companion plant in both beds. To maximize the space. No matter the sides. Everything in each raised bed can thrive together. Also, in case anyone is wondering. We also sealed our raised beds to protect the wood when it rains, when it’s really hot and when it’s really cold. So, that is why our beds have a darker look to them.Would I recommend. Yes, absolutely. I’m not a first time gardener, but this is my first time having raised beds. I chose these because they were elevated. So, it doesn’t put too much stain on my back when gardening. I get that enough with my containers lol. The only negative thing I’ve heard could happen with these beds. Is that the bottoms could cave. I’m praying that doesn’t happen. I’m choosing to take that risk. Overall I love these raised beds, and I’m sure this is just first of many that I will purchase during my garden journey. Happy Gardening.
Michelle Slother –
Easy, sturdy, beautiful!
I never leave reviews but I was so impressed with this. Each piece was perfectly cut, and it was extremely quick and easy to assemble myself. I did use a power drill that made it go faster. The product is beautiful and sturdy!
skoobagirl –
Fantastic planting beds, lousy assembly instructions – missing a whole critical section.
These are great raised planting beds – very sturdy and for the most part, very well made – I say “for the most part” because one of the support slats had a crack in it but I’m not too worried about it and did not send it back. Also, some reviewers recently complained that the beds didn’t come with the promised liner but both of the ones I purchased did.I didn’t give 5 stars because the instruction manual is terrible. In particular, the manual shows that all the part A legs have 3 screw holes on 2 sides – that is correct. But nowhere in the manual does it show or mention that on one of those 2 sides there is a 4th hole that goes with hardware that comes in a bag labelled “5,” which also is not mentioned or shown anywhere in the manual. Once we had the whole raised bed put together we realized that the legs should be assembled so that the side with the 4th hole is on the outside for all of them- you then see there is an inner hole on Panel B where you can insert the small cylindrical type of nut from bag 5 and then insert the long screw from bag 5 into that 4th hole on the leg and screw it into that cylindrical nut for added reinforcement. We realized when we had the whole thing put together that only 2 of the 4 legs had that 4th hole properly facing out and it was too much of a hassle to take the whole thing apart and start from scratch. We learned from our mistake and got it right assembling the second bed but it was so annoying that this 4th hole and bag 5 hardware and what to do with them was not shown anywhere in the manual. I thought we just got a bad manual with a missing page with the first bed but the second bed we got had the same missing information. So make sure you do it right – in the first step the sides of the legs with the 4th hole should face out for all legs (in order to do it right, legs labeled A1 and A2 should go on either side of the same part C panel (vs. putting 2 A1s on one panel C and 2 A2s on the other, which his the mistake we made). Note: Nothing pertaining to the proper assembly position of A1 and A2 legs was mentioned in the manual either. Finally, the last thing you should do after all other steps are completed, for each leg, is to install the reinforcing screw in that 4th hole on the leg and screw into the cylindrical nut that goes into the panel B hole and lines up with it.To have to figure this out on our own really was unacceptable. I’d still buy these beds again though because they are good quality and now I know how to correctly put them together! One last thought – the liner is really hard to keep in position before you put the soil in but another reviewer recommended using large binder clips to keep the liner stable, which was a great idea and worked perfectly!
R Pukay –
This will do nicely
Love these doing remodeling in the backyard. Not as easy to put together as they said. Took us almost an hour. And as you can see from one picture one of the parts was cracked but it did hold together.
Amazon Customer –
Great Urban Gardening
Very easy to put together by yourself. Be aware there is no liner so if you want one order/buy it separately and there is space between the slats for adequate drainage. It is also a good height (I’m 5’6) you don’t have to bend down and it’s very sturdy. It doesn’t have wheels so where you put it is where it’s going to be pretty much , but I bought another version of this from the same company but smaller and with wheels that works great. There is plenty of space I used 6 cubic feet of soil. Happy gardening!
Katarina –
Great!
LOVE LOVE LOVE. it was annoying to put together, definitely a two man job. It’s sturdy, it holds the weight, and it’s long. I was looking at a few different ones and am glad I went with this one!
Neressa Bacchus –
Solid wood great quality
Amazing quality for the price. Took about 10 mins to put together (bc I was going slow with my 5yo). I do recommend a drill to make it go faster but it’s not necessary. Solid wood piece and a beautiful natural wood color. 10/10!!
Canadian Mom –
First one took like 40 minutes to assemble, the other 2 after were 20 minutes.
Susana Fresnedo –
He disfrutado mucho mi caja de hortaliza urbana.
Miriam Galindo –
Es comoda de usar, tiene buen tamaño, la calidad de la madera es buena, solo le puse un protector para la humedad y el sol para asegurarme de su durabilidad.